Node.js Tutorial - Building a Chatroom with Express.js + Socket.IO
• •
In this tutorial we’ll see the basics of creating a Node.js project with two of its most popular modules: Express.js and Socket.IO. We’ll build a simple chatroom from scratch, like those from the early Internet days :P.
The final code is on GitHub, here’s the link.
Requirements
We are going to be building the project from scratch, so the only requirement is that you install, of course, node and npm (if not included with node). Also, I assume you know JavaScript. If you don’t, I totally recommend JavaScript’s track at Codecademy.
Creating a Project
Create the folder where we’ll have our project, we’ll be working from here from now on.
In Node, we don’t really create a project with a specific folder structure, but create an app file instead; that is, the file that will be executed as the node application. You may name the file as you want; in most of the projects I’ve seen it named either app.js or server.js. Since we’ll be building a web server, let’s go with server.js.
Let’s make sure our node installation works properly. Put the following in server.js:
console.log("Hello, world!");Now, run your app. From a terminal window, execute:
$ node server.jsYou should see the output:
Hello, world!Ok, good to go! Now, create a file called package.json.This file serves the purpose of packaging your node project. Here you can specify the project name, author(s) info, dependency modules, node version, etc. There’s an excellent cheat sheet that you can use to package your own project.
For this project, the only info that you need in your package.json file is the following:
{
  "dependencies": {
    "express": "4.6.1",
    "jade": "1.4.2",
    "socket.io": "1.0.6",
    "underscore": "1.6.0",
    "body-parser": "1.4.3"
  }
}
You can put as much info as you like; the more info you put, the more info you are giving others about your app. The dependencies object is used by npm to download any necessary external modules for your app. Let’s go briefly through each one:
- Express: a web framework for node. It is one of the most used modules in node.js; it takes care of a lot of boilerplate code to build a web app. If you are using views in your project, it expects you to use a template engine. By default, it expects
Jadeto be used. - Jade: a template engine for node. If you know HTML, you’ll love Jade. Briefly go through the docs and you’ll see what I mean.
- Socket.IO: a module that makes real-time apps possible. We’ll go into more detail later in this tutorial.
- Underscore: a utility module that has many common operations that you would normally use in other dynamic languages like Groovy or Ruby.
- Body Parser**: **middleware parsing utility for node. We’ll use this to let the server parse JSON requestsNow that we’ve included our dependencies for the project, let’s tell
npmto install the binaries:
$ npm installNpm will automatically read the package.json file and download the dependencies noted in it. The output should be similar to the following:
> ws@0.4.31 install /node_modules/socket.io/node_modules/engine.io/node_modules/ws
> (node-gyp rebuild 2> builderror.log) || (exit 0)

  CXX(target) Release/obj.target/bufferutil/src/bufferutil.o
  SOLINK_MODULE(target) Release/bufferutil.node
  SOLINK_MODULE(target) Release/bufferutil.node: Finished
  CXX(target) Release/obj.target/validation/src/validation.o
  SOLINK_MODULE(target) Release/validation.node
  SOLINK_MODULE(target) Release/validation.node: Finished

> ws@0.4.31 install /node_modules/socket.io/node_modules/socket.io-client/node_modules/engine.io-client/node_modules/ws
> (node-gyp rebuild 2> builderror.log) || (exit 0)

  CXX(target) Release/obj.target/bufferutil/src/bufferutil.o
  SOLINK_MODULE(target) Release/bufferutil.node
  SOLINK_MODULE(target) Release/bufferutil.node: Finished
  CXX(target) Release/obj.target/validation/src/validation.o
  SOLINK_MODULE(target) Release/validation.node
  SOLINK_MODULE(target) Release/validation.node: Finished
underscore@1.6.0 node_modules/underscore

body-parser@1.4.3 node_modules/body-parser
├── qs@0.6.6
├── media-typer@0.2.0
├── bytes@1.0.0
├── raw-body@1.2.2
├── depd@0.3.0
├── iconv-lite@0.4.3
└── type-is@1.3.1 (mime-types@1.0.0)

express@4.6.1 node_modules/express
├── utils-merge@1.0.0
├── merge-descriptors@0.0.2
├── parseurl@1.1.3
├── cookie@0.1.2
├── escape-html@1.0.1
├── finalhandler@0.0.3
├── cookie-signature@1.0.4
├── range-parser@1.0.0
├── fresh@0.2.2
├── vary@0.1.0
├── qs@0.6.6
├── media-typer@0.2.0
├── methods@1.1.0
├── serve-static@1.3.2
├── buffer-crc32@0.2.3
├── depd@0.3.0
├── path-to-regexp@0.1.3
├── accepts@1.0.7 (negotiator@0.4.7, mime-types@1.0.1)
├── type-is@1.3.2 (mime-types@1.0.1)
├── proxy-addr@1.0.1 (ipaddr.js@0.1.2)
├── debug@1.0.3 (ms@0.6.2)
└── send@0.6.0 (ms@0.6.2, mime@1.2.11, finished@1.2.2)

socket.io@1.0.6 node_modules/socket.io
├── debug@0.7.4
├── has-binary-data@0.1.1 (isarray@0.0.1)
├── socket.io-parser@2.2.0 (isarray@0.0.1, emitter@1.0.1, json3@3.2.6)
├── socket.io-adapter@0.2.0 (socket.io-parser@2.1.2)
├── engine.io@1.3.1 (base64id@0.1.0, debug@0.6.0, engine.io-parser@1.0.6, ws@0.4.31)
└── socket.io-client@1.0.6 (to-array@0.1.3, indexof@0.0.1, component-bind@1.0.0, object-component@0.0.3, component-emitter@1.1.2, parseuri@0.0.2, engine.io-client@1.3.1)

jade@1.4.2 node_modules/jade
├── commander@2.1.0
├── character-parser@1.2.0
├── mkdirp@0.5.0 (minimist@0.0.8)
├── transformers@2.1.0 (promise@2.0.0, css@1.0.8, uglify-js@2.2.5)
├── with@3.0.0 (uglify-js@2.4.15)
├── constantinople@2.0.1 (uglify-js@2.4.15)
└── monocle@1.1.51 (readdirp@0.2.5)
You should now have a folder named node_modules. The folder contains all the necessary files and binaries to run your project. This means that now this folder is truly the root folder of your project.
HTTP Server Setup
To set up the HTTP server using Express, we also need the http module included with node. You can go through the node documentation to see other modules included with it. Let’s change the contents of server.js as follows:
NOTE: I’ll comment where necessary; otherwise, it should be self-explanatory.
/*
  Module dependencies:

  - Express
  - Http (to run Express)
  - Body parser (to parse JSON requests)

  It is a common practice to name the variables after the module name.
  Ex: http is the "http" module, express is the "express" module, etc.
*/
var express = require("express")
  , app = express()
  , http = require("http").createServer(app)
  , bodyParser = require("body-parser");

/* Server config */

//Server's IP address
app.set("ipaddr", "127.0.0.1");

//Server's port number
app.set("port", 8080);

//Tells server to support JSON requests
app.use(bodyParser.json());

/* Server routing */

//Handle route "GET /", as in "http://localhost:8080/"
app.get("/", function(request, response) {

  //Show a simple response message
  response.send("Server is up and running");

});

//Start the http server at port and IP defined before
http.listen(app.get("port"), app.get("ipaddr"), function() {
  console.log("Server up and running. Go to http://" + app.get("ipaddr") + ":" + app.get("port"));
});
Start the server:
$ node server.jsYou should see the message:
Server up and running. Go to http://127.0.0.1:8080If you go to that address in a browser, you should see a message as follows:
Awesome! We have an HTTP server up and running. Granted, it doesn’t do much but if you have worked with other web frameworks, you have to admit that it was very easy to set up an HTTP server. If you wanted to use an HTTPS server instead, instead of using the http module you would use the https module instead. Yup, is that easy.
Building a Jade View
This is a two-step process. First we have to tell our server that we are using Jade as our template engine. Then, we’ll create the view of our chatroom.
Add folders to our project where we’ll have all static content (css, client javascript), and one folder with our jade templates, or views. Add the following folder structure to the project:
public/
├── js/
└── css/

views/
Let the server know about this folder. Stop the server if you haven’t already done so and modify server.js:
NOTE: Changes in bold.
/*
  Module dependencies:

  - Express
  - Http (to run Express)
  - Body parser (to parse JSON requests)

  It is a common practice to name the variables after the module name.
  Ex: http is the "http" module, express is the "express" module, etc.
*/
var express = require("express")
  , app = express()
  , http = require("http").createServer(app)
  , bodyParser = require("body-parser");

/* Server config */

//Server's IP address
app.set("ipaddr", "127.0.0.1");

//Server's port number
app.set("port", 8080);
<b>
//Specify the views folder
app.set("views", __dirname + "/views");

//View engine is Jade
app.set("view engine", "jade");

//Specify where the static content is
app.use(express.static("public", __dirname + "/public"));
</b>
//Tells server to support JSON requests
app.use(bodyParser.json());

/* Server routing */

//Handle route "GET /", as in "http://localhost:8080/"
app.get("/", function(request, response) {
<b>
  //Render the view called "index"
  response.render("index");
</b>
});

//Start the http server at port and IP defined before
http.listen(app.get("port"), app.get("ipaddr"), function() {
  console.log("Server up and running. Go to http://" + app.get("ipaddr") + ":" + app.get("port"));
});
Great! Now our server is ready to display views. The only thing missing is an actual view! Under the views folder, create a file named index.jade. This is the view we are telling the server to render when accessing http://localhost:8080. At this point you should probably take a quick look at the Jade documentation but if you don’t feel like it, don’t worry, I’ll create a simple document and the Jade syntax should be self-explanatory. The contents of index.jade should be the following:
doctype html
html
  head
    link(rel='stylesheet', href='http://fonts.googleapis.com/css?family=Open+Sans')
    link(rel='stylesheet', href='/css/style.css')
    title Super Awesome Chatroom
  body
    h1 Super Awesome Chatroom
    div
      div.inlineBlock
        span Your name:
          input(type="text", value="Anonymous")#name
        br
        form#messageForm
          textarea(rows="4", cols="50", placeholder="Share something!", maxlength=200)#outgoingMessage
          input(type="button", value="Share", disabled=true)#send
      div.inlineBlock.topAligned
        b Participants
        br
        div#participants
    div#messages
I’d like to point out that Jade is awesome, I think the documents look way more elegant like this as opposed to simple HTML. Anyhow, we also need to create a stylesheet for the classes we assigned to some of the elements. It should be named style.css under the folder public/css/ with the following:
NOTE: If you decide to name the file other than style.css just make sure you also change it in index.jade.
body {
padding: 3em;
font-family: 'Open Sans', sans-serif;
font-size: 1em;
}
textarea {
resize: none;
}
.inlineBlock {
display: inline-block;
}
.topAligned {
vertical-align: top;
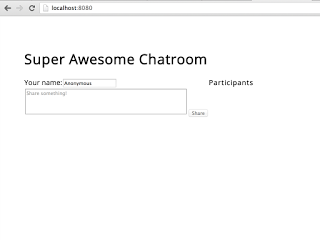
}We have our view! Start (or restart) the server, open the browser and go to http://localhost:8080. You should now see an awesome chatroom that doesn’t do anything (yet!) like the one in the picture:
Web Services with Express
Express is great for creating RESTful web services. From the frameworks I’ve worked with, it has to be one of the easiest, if not the easiest, to build them with. If you take a look at server.js you’ll notice we have the following function to render our view:
//Handle route "GET /", as in "http://localhost:8080/"
app.get("/", function(request, response) {

  //Render the view called "index"
  response.render("index");

});
We could easily change a function like the following:
//Handle route "GET /", as in "http://localhost:8080/"
app.get("/", function(request, response) {

  //Return what's on your mind
  response.json(200, {message: "express is cool"});

});
And that would create a GET service at “http://localhost:8080/” that returns a JSON object. Awesome! Isn’t it? Let’s add a POST method to our server.js to send a chat message. We will also begin using Underscore:
NOTE: Changes in bold.
/*
  Module dependencies:

  - Express
  - Http (to run Express)
  - Body parser (to parse JSON requests)
  - Underscore (because it's cool)

  It is a common practice to name the variables after the module name.
  Ex: http is the "http" module, express is the "express" module, etc<b>
  The only exception is Underscore, where we use, conveniently, an underscore.</b>

*/
var express = require("express")
  , app = express()
  , http = require("http").createServer(app)
  , bodyParser = require("body-parser")
<b>  , _ = require("underscore");</b>

/* Server config */

//Server's IP address
app.set("ipaddr", "127.0.0.1");

//Server's port number
app.set("port", 8080);

//Specify the views folder
app.set("views", __dirname + "/views");

//View engine is Jade
app.set("view engine", "jade");

//Specify where the static content is
app.use(express.static("public", __dirname + "/public"));

//Tells server to support JSON requests
app.use(bodyParser.json());

/* Server routing */

//Handle route "GET /", as in "http://localhost:8080/"
app.get("/", function(request, response) {

  //Render the view called "index"
  response.render("index");

});
<b>
//POST method to create a chat message
app.post("/message", function(request, response) {

  //The request body expects a param named "message"
  var message = request.body.message;

  //If the message is empty or wasn't sent it's a bad request
  if(_.isUndefined(message) || _.isEmpty(message.trim())) {
    return response.json(400, {error: "Message is invalid"});
  }

  //Looks good, let the client know
  response.json(200, {message: "Message received"});

});
</b>
//Start the http server at port and IP defined before
http.listen(app.get("port"), app.get("ipaddr"), function() {
  console.log("Server up and running. Go to http://" + app.get("ipaddr") + ":" + app.get("port"));
});
Let’s test our POST method, (re)start the server and call the method at http://localhost:8080/message. I’m using curl as my REST client, but you can choose whichever you want.
$ curl -X POST -H 'Content-Type:application/json' 'http://localhost:8080/message' -d '{"message":"Good news, everyone!"}'
{
  "message": "Message received"
}
Let’s test a bad request.
$ curl -X POST -H 'Content-Type:application/json' 'http://localhost:8080/message' -d '{"invalidParam":"Good news, everyone!"}'
{
  "error": "Message is invalid"
}
$ curl -X POST -H 'Content-Type:application/json' 'http://localhost:8080/message' -d '{"message":""}'
{
  "error": "Message is invalid"
}
This is as far as we’ll go with RESTful services in this tutorial, but feel free to browse through the Express documentation and build more methods or add options to our POST method.
Making real-time apps with Socket.IO
So far we have a web server that receives incoming messages that does nothing with them, and a view that can’t even send a message. I think that now it’s a good time to make this a real-time app. Let’s talk a little bit about Socket.IO first.
Socket.IO is a module that aims at making real-time apps possible. Long story short, it consists of a server that receives and emits events to all the clients, or just a set of clients, that connect to it. Here’s a list of browser and transport support for it. There are many websites that use Socket.IO, however, an excellent implementation of it is Trello. Fog Creek Software, its creator, have an excellent post on the website’s tech stack, including comments on their implementation of Socket.IO. It is definitely worth a read.
We are going to set up our socket server with our web server, but if you are considering building a huge website you should definitely implement your socket.IO server as a dedicated service instead of mixing it with your web server. Modify the header of server.js with the following:
NOTE: Changes in bold.
/*
  Module dependencies:

  - Express
  - Http (to run Express)
  - Body parser (to parse JSON requests)
  - Underscore (because it's cool)
<b>  - Socket.IO(Note: we need a web server to attach Socket.IO to)</b>

  It is a common practice to name the variables after the module name.
  Ex: http is the "http" module, express is the "express" module, etc.
  The only exception is Underscore, where we use, conveniently, an
  underscore. <b>Oh, and "socket.io" is simply called io. Seriously, the
  rest should be named after its module name.</b>

*/
var express = require("express")
  , app = express()
  , http = require("http").createServer(app)
  , bodyParser = require("body-parser")<b>
  , io = require("socket.io").listen(http)</b>
  , _ = require("underscore");

/* Server config */
...
Yup, we now have a socket.IO server up and running at the same location as our web server (http://localhost:8080). Let’s test it, shall we? For development purposes, socket.IO serves its client library at /socket.io/socket.io.js. Let’s also go ahead and create a JavaScript file that will be used in our client. Name it index.js (or whatever you like, just make sure it’s called the same in your index.jade file) and add it to our static location of JavaScript files, public/js/. Finally, we’ll use jQuery for our client code, so we’ll use it with a CDN (this example works with version 1.11). Modify the head tag of index.jade so it includes all JavaScript files, socket.io.js, jquery-1.11.0.min.js and index.js:
NOTE: Changes in bold.
doctype html
html
  head
    link(rel='stylesheet', href='http://fonts.googleapis.com/css?family=Open+Sans')
    link(rel='stylesheet', href='/css/style.css') <b>
    script(src='//code.jquery.com/jquery-1.11.0.min.js')
    script(src='/socket.io/socket.io.js')
    script(src='/js/index.js')</b>
    title Super Awesome Chatroom
  body
    ...
Let’s put the following in index.js:
NOTE: I’ll comment where necessary; otherwise, it should be self-explanatory. Also, I’m not going to explain jQuery, you can go to Codecademy for that. They’ve got excellent tutorials.
function init() {

  var serverBaseUrl = document.domain;

  /*
   On client init, try to connect to the socket.IO server.
   Note we don't specify a port since we set up our server
   to run on port 8080
  */
  var socket = io.connect(serverBaseUrl);

  //We'll save our session ID in a variable for later
  var sessionId = '';

  /*
 When the client successfully connects to the server, an
 event "connect" is emitted. Let's get the session ID and
 log it.
  */
  socket.on('connect', function () {
    sessionId = socket.io.engine.id;
    console.log('Connected ' + sessionId);
  });
}

$(document).on('ready', init);
Let’s test it! (Re)start the server, as soon as you start the server you should see an info message from the socket.IO server:
$ node server.js
Server up and running. Go to http://127.0.0.1:8080
Open the browser and go to http://localhost:8080. Take a look at the browser console and you should see the log along with a session ID as follows:
Connected b0mT1Y370LFMU7rKXTsPWoohoo! We now have a socket.IO server along out web server and successfully connected a client to it. We can now finish our chatroom!
A Chatroom
Let’s use what we just did to finish our chatroom. We are going to be working with the following events between our client and server:
- When a new user connects to our server, he will emit an event called
newUserand the server will emit an event callednewConnectionwith a list of all participants to all connected clients - When a user changes his name, he will emit an event called
nameChangeand the server will emit an event callednameChangedto all participants with the id and new name of the user who emitted the original message - When a client disconnects from the server, an event called
disconnectis automatically captured by the server. It will then emit an event to all participants with the id of the client that disconnected - When a client sends a message through our POST method, the server will emit an event called
incomingMessagewhich will send the sender’s name and the message to all clients to show on their viewsLet’s add all this fancy stuff to our server. This is the final version ofserver.js:
NOTE: Changes in bold.
/*
  Module dependencies:

  - Express
  - Http (to run Express)
  - Body parser (to parse JSON requests)
  - Underscore (because it's cool)
  - Socket.IO

  It is a common practice to name the variables after the module name.
  Ex: http is the "http" module, express is the "express" module, etc.
  The only exception is Underscore, where we use, conveniently, an
  underscore. Oh, and "socket.io" is simply called io. Seriously, the
  rest should be named after its module name.

*/
var express = require("express")
  , app = express()
  , http = require("http").createServer(app)
  , bodyParser = require("body-parser")
  , io = require("socket.io").listen(http)
  , _ = require("underscore");
<b>
/*
  The list of participants in our chatroom.
  The format of each participant will be:
  {
    id: "sessionId",
    name: "participantName"
  }
*/
var participants = [];
</b>
/* Server config */

//Server's IP address
app.set("ipaddr", "127.0.0.1");

//Server's port number
app.set("port", 8080);

//Specify the views folder
app.set("views", __dirname + "/views");

//View engine is Jade
app.set("view engine", "jade");

//Specify where the static content is
app.use(express.static("public", __dirname + "/public"));

//Tells server to support JSON requests
app.use(bodyParser.json());

/* Server routing */

//Handle route "GET /", as in "http://localhost:8080/"
app.get("/", function(request, response) {

  //Render the view called "index"
  response.render("index");

});

//POST method to create a chat message
app.post("/message", function(request, response) {

  //The request body expects a param named "message"
  var message = request.body.message;

  //If the message is empty or wasn't sent it's a bad request
  if(_.isUndefined(message) || _.isEmpty(message.trim())) {
    return response.json(400, {error: "Message is invalid"});
  }
<b>
  //We also expect the sender's name with the message
  var name = request.body.name;

  //Let our chatroom know there was a new message
  io.sockets.emit("incomingMessage", {message: message, name: name});
</b>
  //Looks good, let the client know
  response.json(200, {message: "Message received"});

});
<b>
/* Socket.IO events */
io.on("connection", function(socket){

  /*
    When a new user connects to our server, we expect an event called "newUser"
    and then we'll emit an event called "newConnection" with a list of all
    participants to all connected clients
  */
  socket.on("newUser", function(data) {
    participants.push({id: data.id, name: data.name});
    io.sockets.emit("newConnection", {participants: participants});
  });

  /*
    When a user changes his name, we are expecting an event called "nameChange"
    and then we'll emit an event called "nameChanged" to all participants with
    the id and new name of the user who emitted the original message
  */
  socket.on("nameChange", function(data) {
    _.findWhere(participants, {id: socket.id}).name = data.name;
    io.sockets.emit("nameChanged", {id: data.id, name: data.name});
  });

  /*
    When a client disconnects from the server, the event "disconnect" is automatically
    captured by the server. It will then emit an event called "userDisconnected" to
    all participants with the id of the client that disconnected
  */
  socket.on("disconnect", function() {
    participants = _.without(participants,_.findWhere(participants, {id: socket.id}));
    io.sockets.emit("userDisconnected", {id: socket.id, sender:"system"});
  });

});
</b>
//Start the http server at port and IP defined before
http.listen(app.get("port"), app.get("ipaddr"), function() {
  console.log("Server up and running. Go to http://" + app.get("ipaddr") + ":" + app.get("port"));
});
I think the code and the comments are self-explanatory. If not, let me know in the comments section to update it accordingly.
Let’s finish this chatroom by extending the index.js file with the events we just defined.
NOTE: Changes in bold.
function init() {
var serverBaseUrl = document.domain;
/*
On client init, try to connect to the socket.IO server.
Note we don't specify a port since we set up our server
to run on port 8080
*/
var socket = io.connect(serverBaseUrl);
//We'll save our session ID in a variable for later
var sessionId = '';
//Helper function to update the participants' list
function updateParticipants(participants) {
$('#participants').html('');
for (var i = 0; i < participants.length; i++) {
$('#participants').append('<span id="' + participants[i].id + '">' +
participants[i].name + ' ' + (participants[i].id === sessionId ? '(You)' : '') + '<br /></span>');
}
}
/*
When the client successfully connects to the server, an
event "connect" is emitted. Let's get the session ID and
log it.<b> Also, let the socket.IO server there's a new user
with a session ID and a name. We'll emit the "newUser" event
for that.</b>
*/
socket.on('connect', function () {
sessionId = socket.io.engine.id;
console.log('Connected ' + sessionId);<b>
socket.emit('newUser', {id: sessionId, name: $('#name').val()});</b>
});
<b>
/*
When the server emits the "newConnection" event, we'll reset
the participants section and display the connected clients.
Note we are assigning the sessionId as the span ID.
*/
socket.on('newConnection', function (data) {
updateParticipants(data.participants);
});
/*
When the server emits the "userDisconnected" event, we'll
remove the span element from the participants element
*/
socket.on('userDisconnected', function(data) {
$('#' + data.id).remove();
});
/*
When the server fires the "nameChanged" event, it means we
must update the span with the given ID accordingly
*/
socket.on('nameChanged', function (data) {
$('#' + data.id).html(data.name + ' ' + (data.id === sessionId ? '(You)' : '') + '<br />');
});
/*
When receiving a new chat message with the "incomingMessage" event,
we'll prepend it to the messages section
*/
socket.on('incomingMessage', function (data) {
var message = data.message;
var name = data.name;
$('#messages').prepend('<b>' + name + '</b><br />' + message + '<hr />');
});
/*
Log an error if unable to connect to server
*/
socket.on('error', function (reason) {
console.log('Unable to connect to server', reason);
});
/*
"sendMessage" will do a simple ajax POST call to our server with
whatever message we have in our textarea
*/
function sendMessage() {
var outgoingMessage = $('#outgoingMessage').val();
var name = $('#name').val();
$.ajax({
url: '/message',
type: 'POST',
contentType: 'application/json',
dataType: 'json',
data: JSON.stringify({message: outgoingMessage, name: name})
});
}
/*
If user presses Enter key on textarea, call sendMessage if there
is something to share
*/
function outgoingMessageKeyDown(event) {
if (event.which == 13) {
event.preventDefault();
if ($('#outgoingMessage').val().trim().length <= 0) {
return;
}
sendMessage();
$('#outgoingMessage').val('');
}
}
/*
Helper function to disable/enable Send button
*/
function outgoingMessageKeyUp() {
var outgoingMessageValue = $('#outgoingMessage').val();
$('#send').attr('disabled', (outgoingMessageValue.trim()).length > 0 ? false : true);
}
/*
When a user updates his/her name, let the server know by
emitting the "nameChange" event
*/
function nameFocusOut() {
var name = $('#name').val();
socket.emit('nameChange', {id: sessionId, name: name});
}
/* Elements setup */
$('#outgoingMessage').on('keydown', outgoingMessageKeyDown);
$('#outgoingMessage').on('keyup', outgoingMessageKeyUp);
$('#name').on('focusout', nameFocusOut);
$('#send').on('click', sendMessage);
</b>
}
$(document).on('ready', init);Aaaaaand, that’s it! (Re)start the server and see our chatroom in action!
$ node server.js
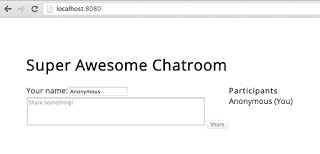
Server up and running. Go to http://127.0.0.1:8080Let’s open a browser to http://localhost:8080. You should see the following:
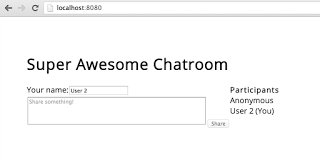
Now, open another tab or window at the same address:
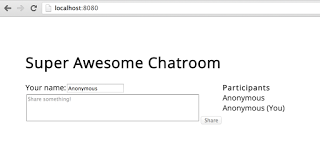
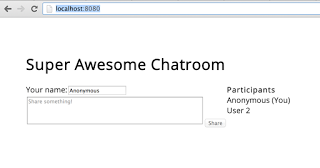
You should see the list of participants on both sessions. Now change the name of one of the users:
All sessions should reflect the change:
Send a message from one of the sessions:
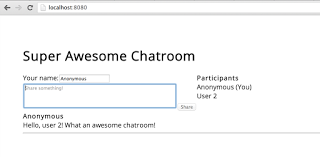
Check the other session to see the message that was sent:
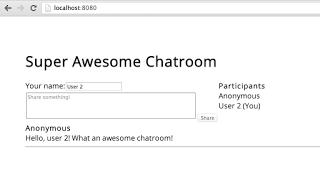
Finally, send a message back to the other session:
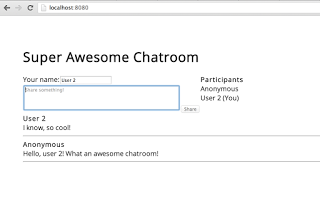
Your super awesome chatroom is now complete! Note that this is a very basic implementation of different node modules, and also know that this chatroom is vulnerable to XSS and you should at the very least add an HTML sanitizer if you intend to use it for a real-world application.
What I would like now is for you to be creative and add events, styles, and cool functionalities to the chatroom. Share them all in the comments section or let everyone know what you thought of this tutorial!
Thanks for reading this far, I put a lot of effort into making this tutorial. If you liked it, I would really appreciate it if you could help spread the word by sharing this post.